
Intall POSTFIX
Instal postfix by command.
- sudo apt-get install postfix
page one Please select the mail server you select OK
next page General type of mail configuration select No configuration
Postfix is set to run Local mail by command.
- dpkg-reconfigure postfix
display General type of mail configuration : you select Local only
next page System mail name is set to Domain change yourdomain.com
page Root and postmaster mail recipient is set user root.
page Otther destinations to accept mail for : set default press OK next page
page Force syschronous updates on mail queue? : NO
page Local networks is your insert Network IP for network of you such as 192.168.1.0/24
page Mailbox size limit(byte) : 0 (insert number 0 no limit)
page Local Address extension charater : +
page Internet Protocal to use : all
Edit main.cf
Edit main.cf by command.- sudo nano /etc/postfix/main.cf
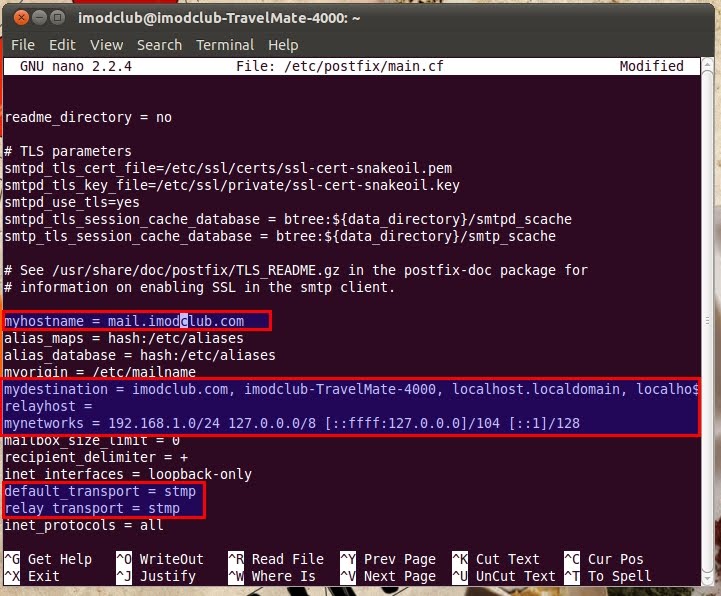
And add the command below. relay_domains = $mydestination imodclub.com
save and reload
- /etc/init.d/postfix reload
Test run by telnet command.
telnet localhost 25 ---->(Enter)
mail from: imodclub@imodclub.com ---> (command email send)
rcpt to : sittinan@imodclub.com ----> (command email receive)
If the message displayed ok, it passed.
INSTALL IMAP4/POP3 (Dovecot)
Instal IMAP4/POP3 by command.
- sudo apt-get install dovecot-common dovecot-imapd dovecot-pop3d
Edit dovevot.conf
Edit dovevot.conf by command.- sudo nano /etc/dovecot/dovecot.conf
The Find messages. Then remove the # mark in front of the message below out.
- listen = *
protocols = imap imaps pop3 pop3s
disable_plaintext_auth = no
mail_location = mbox:~/mail:INBOX=/var/mail/%u
login_executable = /usr/lib/dovecot/imap-login
mail_executable = /usr/lib/dovecot/imap
Save and restart service postfix, dovecot by command.
- sudo /etc/init.d/postfix restart
sudo /etc/init.d/dovecot restart
Test run by telnet command.
- telnet localhost 110 for pop3 (command quit for telnet)
telnet localhost 143 for imap (commande 3 logout for telnet)
Test send mail.
telnet localhost 25 ---->(Enter)
mail from: imodclub@imodclub.com ---> (command email send)
rcpt to : sittinan@imodclub.com ----> (command email receive)
data ----->(Enter)
message!
(end for press key .)
If the message displayed ok, it passed.

Install Squirrelmail
Install Squirrelmail command.
- apt-get install squirrelmail squirrelmail-decode php5
Configure squirrelmail
- perl /usr/share/squirrelmail/config/conf.pl
Welcome to configuretion.
1. press 2 for sub menu.
2. press 1 for edit Domain : yourdomain.com press enter.
3. press A for edit update IMAP Settings : yourdomain.com
4. press B for edit update SMTP Settings : yourdomain.com
5. press r to return main menu.
10 press 10 for edit Languages : set languages for you.
11 press s for save data.
12 press q for quit.
copy /etc/squirrelmail/apache.conf goto /etc/apache2/conf.d by command.
- sudo cp /etc/squirrelmail/apache.conf goto /etc/apache2/conf.d
edit config.php by command.
- sudo nano /usr/share/squirrelmail/config/config.php
Search line command $useSendmail = false; change to $useSendmail = ture;
restart apache2 sudo /etc/init.d/apache2 restart
Open web browser URL http://www.yourhost.com/squirrelmail


ความคิดเห็น
-Sam
And add the command below. relay_domains = $mydestination imodclub.com
i cant see any "relay_domains =" Line
Add the last line. on file /etc/postfix/main.cf and save and reload.
relay_domains = $mydestination yourdomain