
phpmyadmin project is open-sourch Used in Management database MySQL Server GUI Model (Web-base Application) Help to work easy ดor example, to create database. to create table database managemen. By the management in front of the website has it.
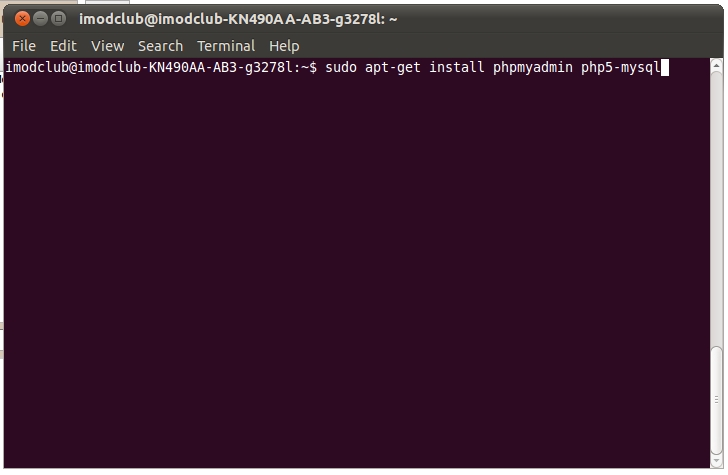
1. Install phpMyAdmin command.
sudo apt-get install phpmyadmin php5-mysql

- Show display install and display select server. You selected server apache2 by key spacebar and press key tab select OK
2. configure config.inc.php
- The system file to config.default.php (in directory /usr/share/phpmyadmin/libraies) Make a copy of the file in /usr/share/phpMyAdmin by command.
cp /usr/share/phpmyadmin/libraries/config.default.php /usr/share/phpmyadmin
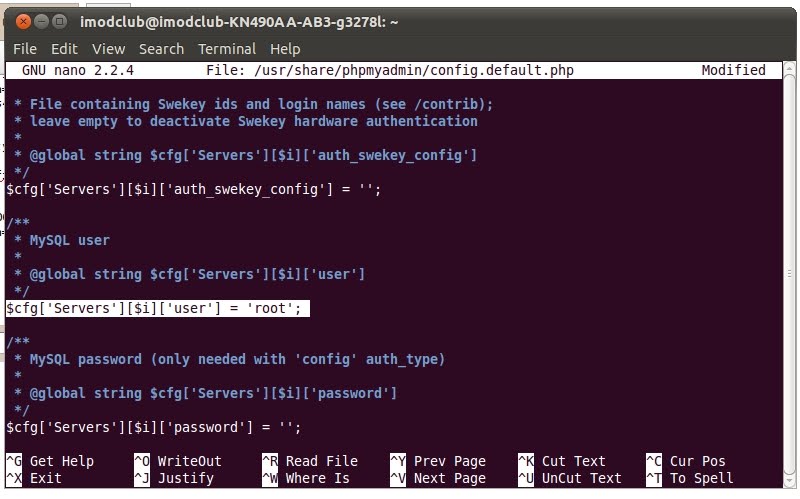
- Then edit file config. config.default.php Will be fixed in the host, user, password and authentication by command
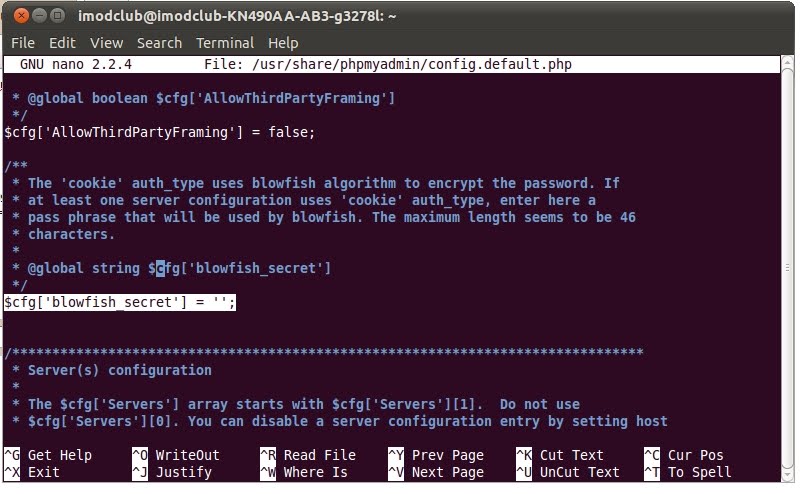
sudo nano /usr/share/phpmyadmin/config.default.php

- Before editing, You press Ctrl+w and insert text cfg['blowfish_secret'] .

cfg['blowfish_secret']=''; Any input value.

- Before editing, You press Ctrl+w and insert text cfg['servers'][$i]['host'] .
- After editing, cfg['servers'][$i]['host'] = 'localhost'; (insert value localhost)

- Before editing, You press Ctrl+w and insert text cfg['servers'][$i]['auth_type'] . (you see value = cookie.)
- After editing, cfg['servers'][$i]['auth_type'] = 'config'; (edit value config)

- Before and After editing, cfg['servers'][$i]['user'] = 'root'; (no edit)
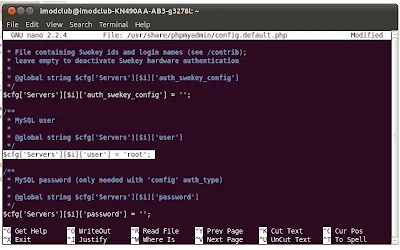
- Before and After editing, cfg['servers'][$i]['password'] = '';

- After editing, Insert password MySql.

- You press key Ctrl+x to save the file config.default.php
3. Test phpmyadmin by Open browser and insert value http://localhost/phpmyadmin (localhost or ipaddress server)
Note : If you can not work to edit file config.default.php
sudo nano /usr/share/config.default.php
Search text $cfg['PmaAbsoluteUri']= ''; by press key Ctrl+w and Editing.
$cfg['PmaAbsoluteUri']= 'localhost/phpmyadmin';
Note : If you can not work. You create link by typing command.
sudo ln -s /usr/share/phpmyadmin /var/www/phpmyadmin
4. Use phpMyAdmin
4.1 loging phpmyadmin by http://localhost/phpmyadmin
user : root
password : (for you)

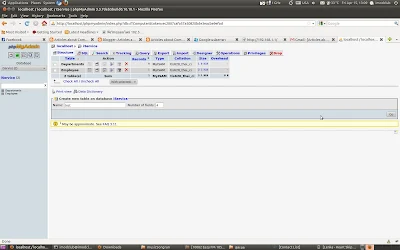
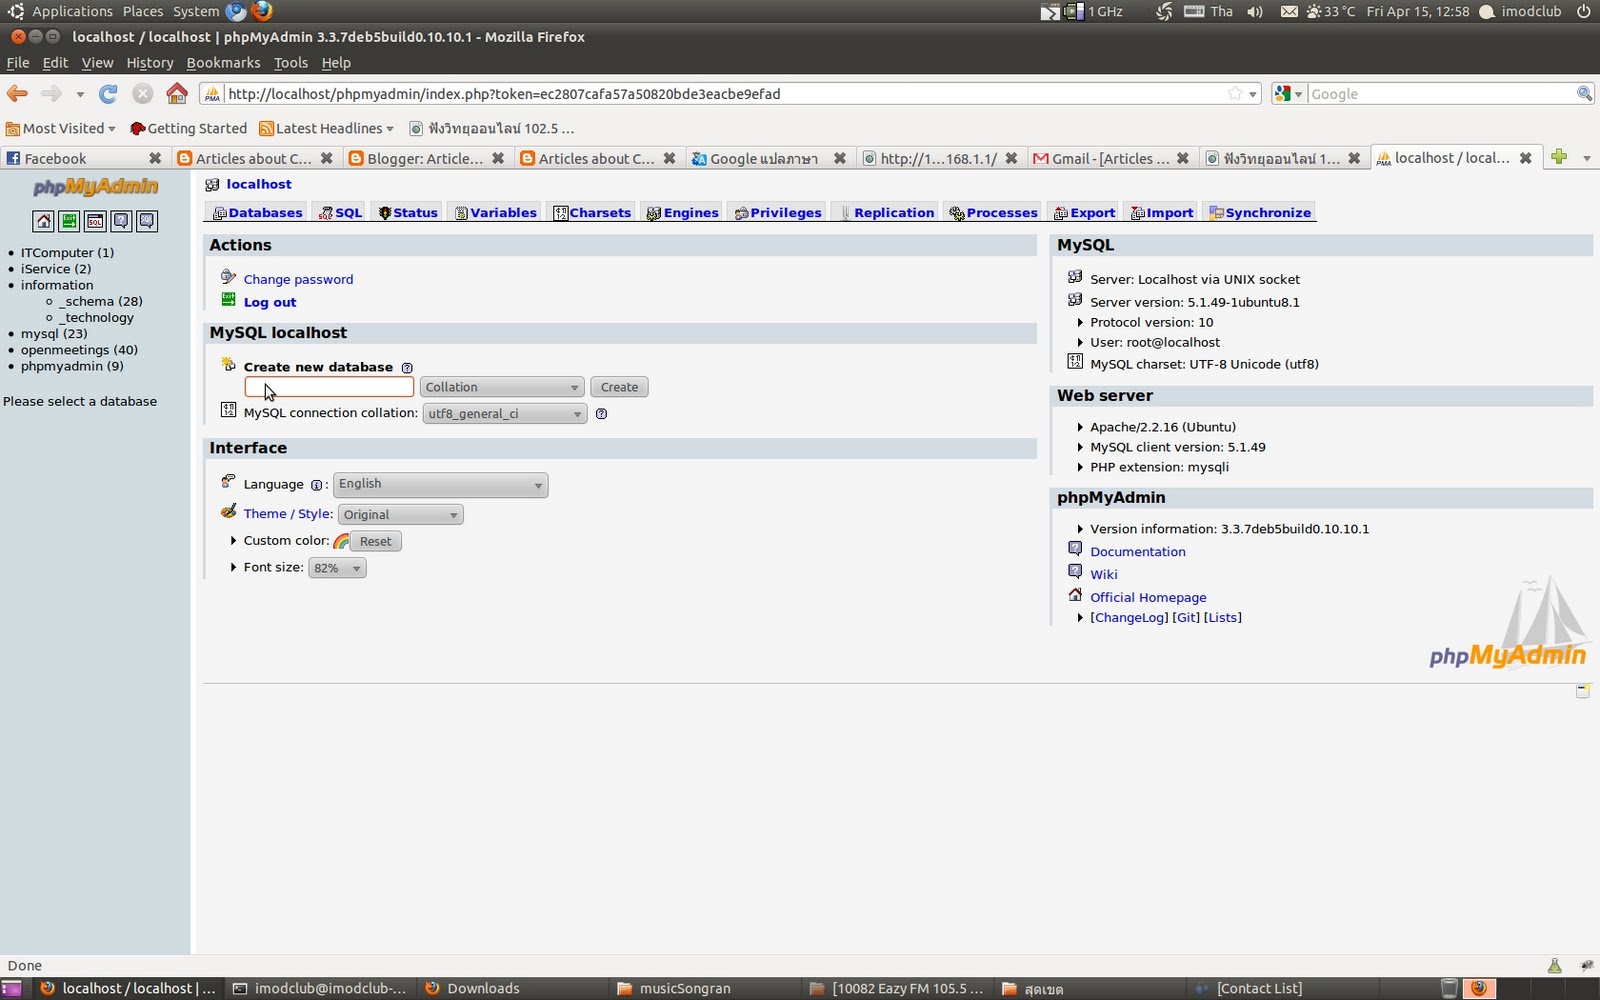
4.2 Create a database. You can create a database in the field "Create a new database"

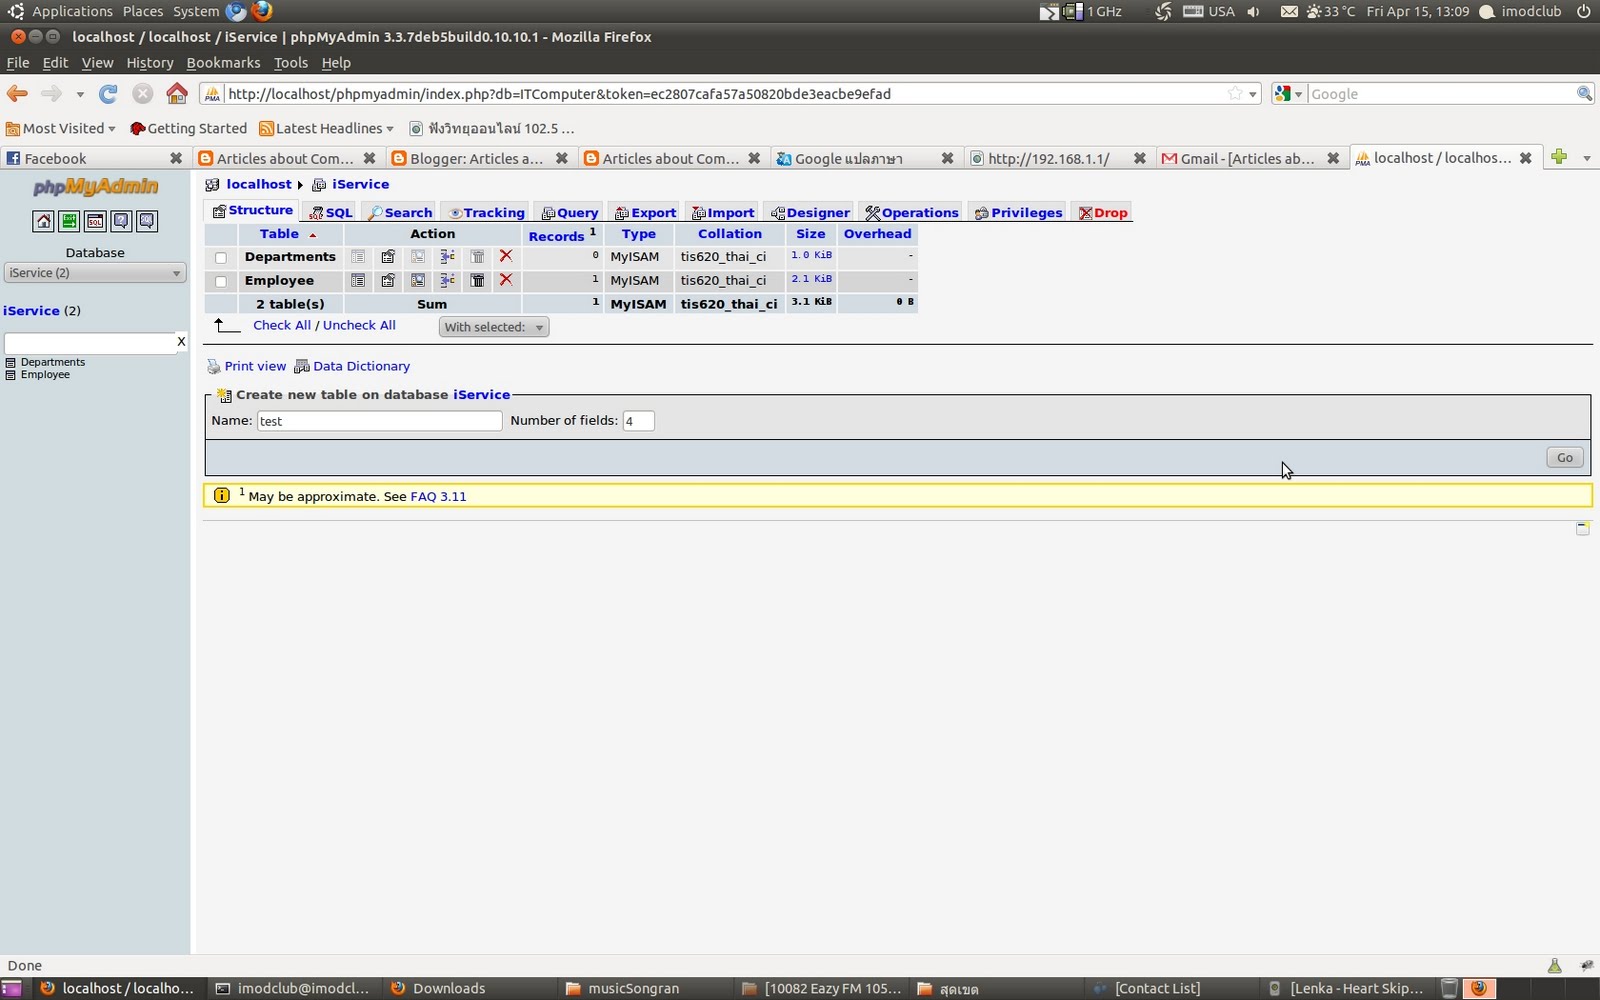
4.3 Create a table. You can create a table in the field "Create new table on database ..". and press button GO
4.4 Insert Field and type data. and click save button

4.5 Insert data. Select Lift table and on insert button.


- Click GO button
4.6 Viewing information in the table. Clik Browser

4.7 Delete information.

End ::
Next page on click : Install CMS Drupal 7 ubuntu 10.10 system
Reverse page on click : Configure apache to support php
1. Install phpMyAdmin command.
sudo apt-get install phpmyadmin php5-mysql
- Show display install and display select server. You selected server apache2 by key spacebar and press key tab select OK
2. configure config.inc.php
- The system file to config.default.php (in directory /usr/share/phpmyadmin/libraies) Make a copy of the file in /usr/share/phpMyAdmin by command.
cp /usr/share/phpmyadmin/libraries/config.default.php /usr/share/phpmyadmin
- Then edit file config. config.default.php Will be fixed in the host, user, password and authentication by command
sudo nano /usr/share/phpmyadmin/config.default.php

- Before editing, You press Ctrl+w and insert text cfg['blowfish_secret'] .
cfg['blowfish_secret']=''; Any input value.

- Before editing, You press Ctrl+w and insert text cfg['servers'][$i]['host'] .
- After editing, cfg['servers'][$i]['host'] = 'localhost'; (insert value localhost)

- Before editing, You press Ctrl+w and insert text cfg['servers'][$i]['auth_type'] . (you see value = cookie.)
- After editing, cfg['servers'][$i]['auth_type'] = 'config'; (edit value config)

- Before and After editing, cfg['servers'][$i]['user'] = 'root'; (no edit)
- Before and After editing, cfg['servers'][$i]['password'] = '';

- After editing, Insert password MySql.

- You press key Ctrl+x to save the file config.default.php
3. Test phpmyadmin by Open browser and insert value http://localhost/phpmyadmin (localhost or ipaddress server)
Note : If you can not work to edit file config.default.php
sudo nano /usr/share/config.default.php
Search text $cfg['PmaAbsoluteUri']= ''; by press key Ctrl+w and Editing.
$cfg['PmaAbsoluteUri']= 'localhost/phpmyadmin';
Note : If you can not work. You create link by typing command.
sudo ln -s /usr/share/phpmyadmin /var/www/phpmyadmin
4. Use phpMyAdmin
4.1 loging phpmyadmin by http://localhost/phpmyadmin
user : root
password : (for you)

4.2 Create a database. You can create a database in the field "Create a new database"
4.3 Create a table. You can create a table in the field "Create new table on database ..". and press button GO
4.4 Insert Field and type data. and click save button

4.5 Insert data. Select Lift table and on insert button.


- Click GO button
4.6 Viewing information in the table. Clik Browser

4.7 Delete information.

End ::
Next page on click : Install CMS Drupal 7 ubuntu 10.10 system
Reverse page on click : Configure apache to support php
ความคิดเห็น